When was the last time you took pictures of yourself while preparing food? This felt similarly strange and awkward. I initially assumed that people would find the work-in-progress documentation boring, if not unnecessary, but I’ve been convinced otherwise. The question, “How do you build these things?” comes up often, and I think now is a good time to address it, as I am currently working on a couple of new large coiled vessels. Somewhere halfway into making the two new vessels I decided to take pictures with my phone, and so far the recording aspect is proving to be messy and difficult to keep up (phone covered in clay, getting sidetracked, missing shots, starting over) but I’m glad I’m doing it, however half-assed it may be. It’s nice to step back and look at some of the work that goes into these. I feel lucky to be able to work on them at the Loyola ceramics studio, where the administration is incredibly tolerant of my extravagant endeavors. The students tend to get curious and inspired when they see me working on these, so in the end it’s truly a win-win.
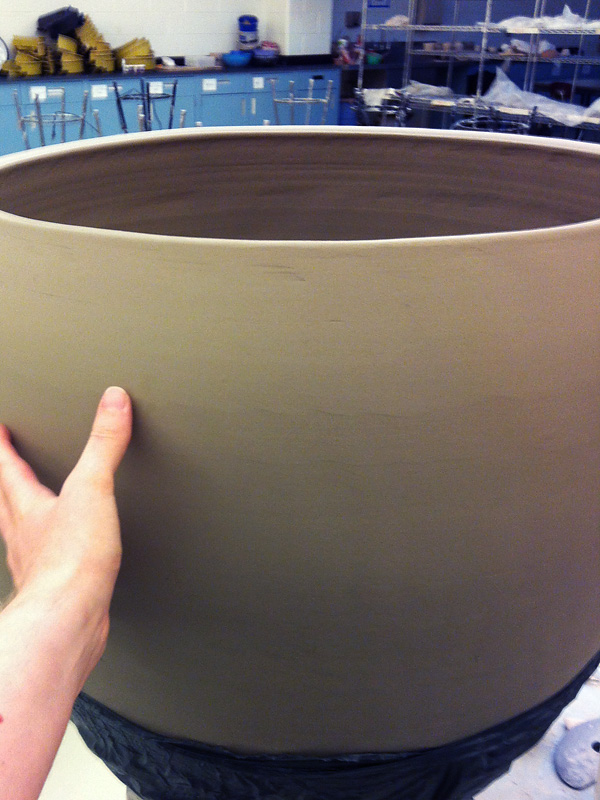
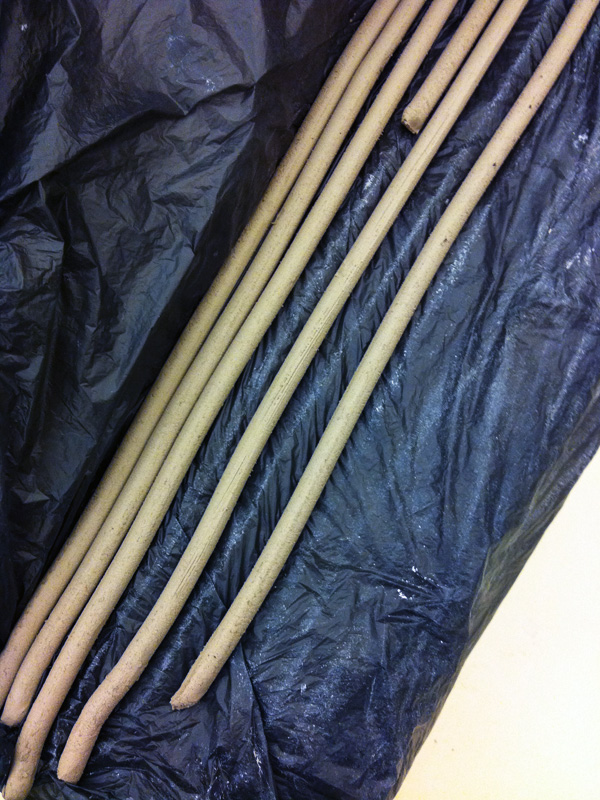
I build these vessels out of coils made from a simple stoneware clay body. In order to give the clay added strength (during both building and firing) I tweak the recipe by adding extra grog and a handful of nylon fibers. I begin the process by wheelthrowing something that looks like a dog bowl, and then I stack four coils on its rim and blend them together. Once blended and smoothed (by kicking the wheel and using a wooden rib to flatten the clay), I let the wall dry and stiffen a bit. Then I stack four more, and so on… This is a relatively straightforward method. It’s not as easy as it looks though, as it requires both decent wheelthrowing skills and an understanding of how clay responds to water, compression, drying, etc., but with practice it gets easier. I tend to use a serrated (i.e. toothed) metal scraper to score the coil lengthwise before pressing it onto the rim. I usually don’t use any slip unless the rim has dried and there is a slight difference in the moisture content between the rim and the next coil.
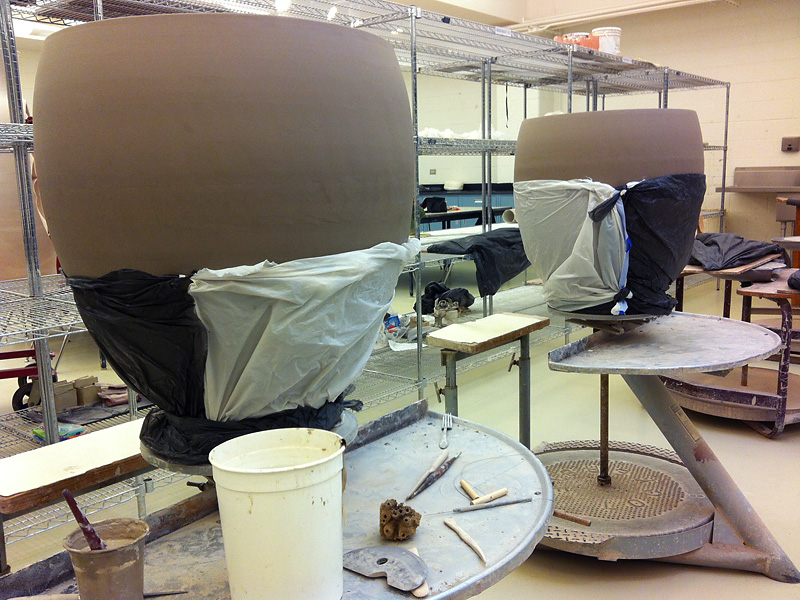
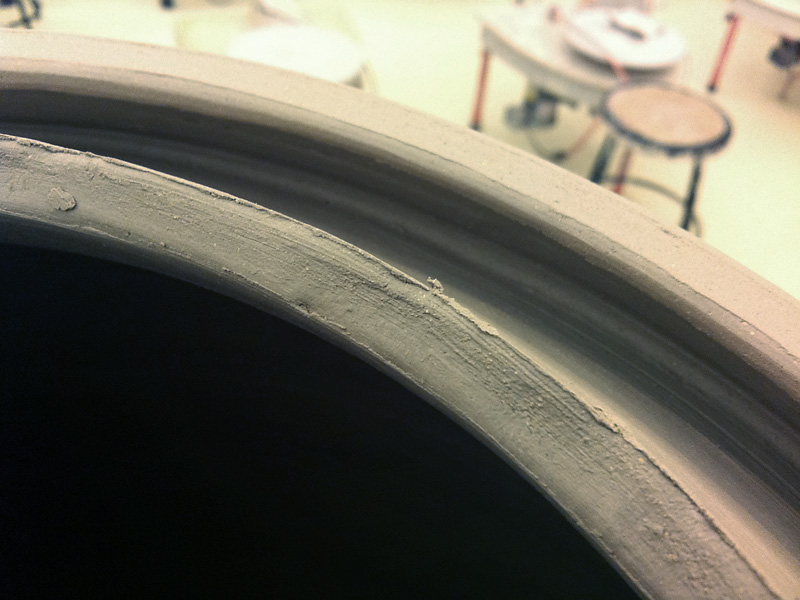
The real trickery comes in when it’s time to create a second (or third… or fourth…) wall, as I did in Fornix Vessel. This is the part that tends to mystify people. It’s really not that difficult once you get the hang of the basic process. Unlike a small double-walled vessel thrown on a wheel, in these large vessels the extra wall is simply added onto the surface of the existing wall. The picture shows two extra coils added to the surface of the vessel. I decided that my usual four-coil method wasn’t going to work in this delicate step, so I held back and initially used only two. The most difficult part after this is keeping up with two walls separately without damaging one while working on the other. I tend to have several oddly shaped wooden tools at hand so I can get between the two walls and keep smoothing them as I move along, adding more coils to each wall.
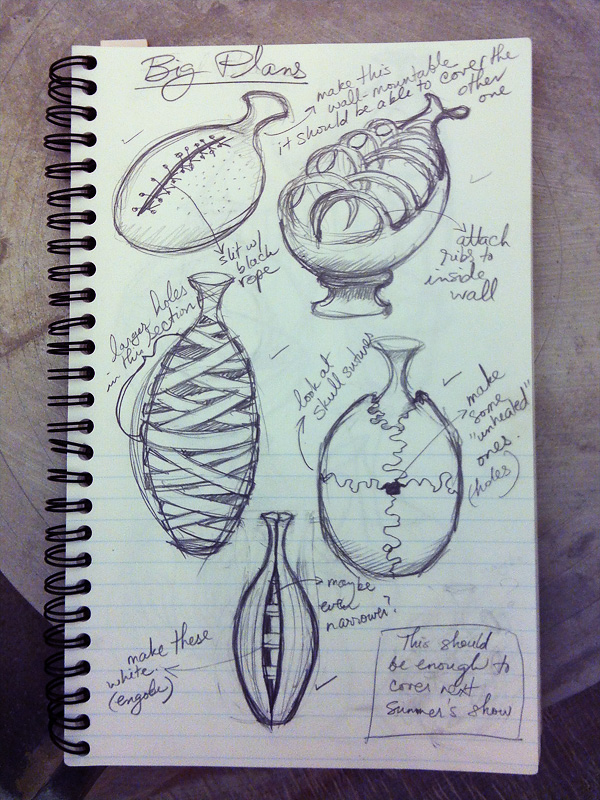
The plans for this particular double-walled vessel are pictured on the bottom right of my sketchbook. Once carved, the vessel’s body will vaguely resemble a human skull placed vertically on end (with sutures that are still growing together) while the top fluted part will stay vessel-like and relatively traditional. Currently I am imagining the top in a red glaze, but I rarely plan the colors and textures before seeing the finished form.
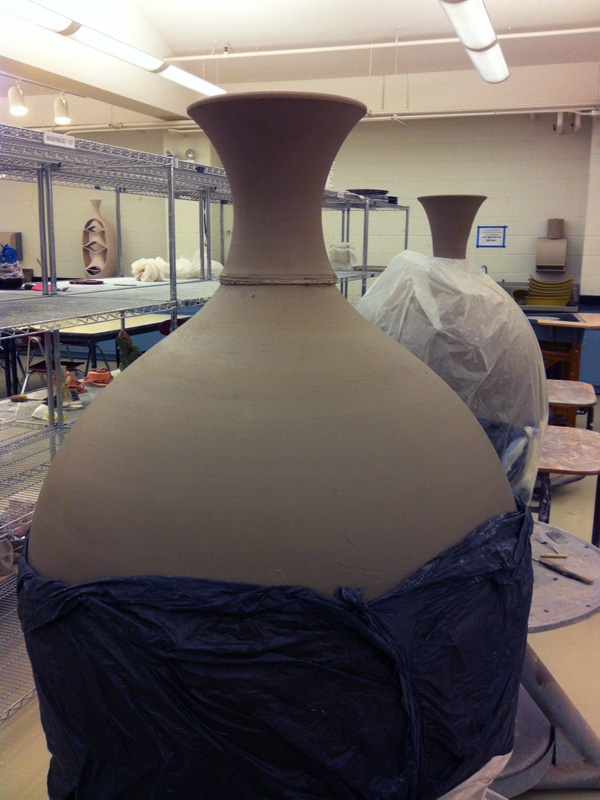
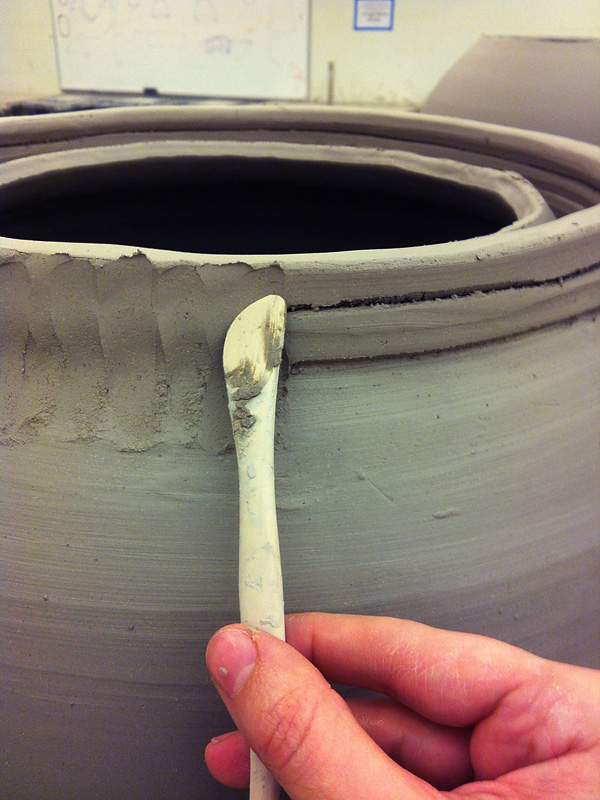
The second of the two vessels that I’m currently working on is pictured in the upper right-hand corner of the sketchbook. This one is quite challenging, and I’m not sure that it will even work out, but I’m giving it a shot. Basically, right now I’m throwing the vessel itself. Later I’ll be worrying about cutting it in half, attaching it to a plinth or base of sorts, and adding “ribs.” You can see the work in progress in the foreground of the next picture. As revealed by this photo, the fluted top is something that I throw separately and then attach to the rest of the vessel. The neck is just too narrow and subtle of a form to be made out of coils. In the following step I will use a ribbon tool to trim away the additional clay where the seam is slightly mismatched.
With this basic method for coiling a large vessel, I like to play with variations and challenges. In Eggshell Vessel, I threw the fluted top separately as usual (making sure that the bottom of this part was much wider than the top) and then flipped it upside-down into the large form. Once it all meshed and stiffened a bit, I continued coiling as though I never added the upside-down fluted form, and at some point along the way I trimmed off the excess clay that was protruding from the sides. The “broken through” opening was something that I carved out at the very end.
Did this entry clarify things or just create more questions? It is relatively concise (considering how much subtlety goes into ceramic work!), so my intern and I will make a much more detailed step-by-step account of this process, most likely in April. Having a second set of hands will help, since taking timed pictures while working is otherwise kind of impossible without a fancy camera… and, well, you know the sorts of cameras I tend to work with.
I love the detailed description of the process. They are amazing pieces visually, with layers exposed… simply beautiful.